Welcome!
I'm Mariesa, momma to two little girls, wife and crafter. I share my latest project and sometimes a tutorial or two in this space. Look around and enjoy. I'm soo glad you stopped by!My Etsy Shop
Grab My Button!
Nice Chicks
Tags
Activity Days Baby Baby Food Blanket Blog Swap Bow Cake Chevron Christmas Craft Easter Easy Project Elf Etsy Family History Flowers Food Hair Clip Holiday Home Decor Home Decorating Journal Kid Activity Kids LDS Moment Pattern Printable Quilt Random Recipe Ribbon Running Scripture Journal Sewing Silhouette Summer Fun Teaching Thrifty Toddler Tradition Tutorial Valentines Visiting Teaching Wordless-
Recent Posts
Archives
- March 2023
- January 2023
- December 2022
- November 2022
- August 2019
- July 2019
- October 2018
- June 2018
- May 2018
- August 2017
- May 2017
- April 2017
- April 2013
- March 2013
- November 2012
- October 2012
- September 2012
- August 2012
- July 2012
- June 2012
- May 2012
- January 2012
- December 2011
- November 2011
- October 2011
- September 2011
- August 2011
- July 2011
- June 2011
- May 2011
- April 2011
- March 2011
- February 2011
- January 2011
- December 2010
- November 2010
- October 2010
- September 2010
- August 2010
Blog Design By:

Using Buttercup by Flergs.
Drying Mat & Dish Soap
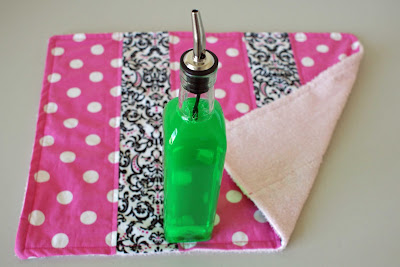
Oh how I love to make dish mats! This is a simplified version of the dish mat tutorial on Fly Through Our Window. When I looked at the dimensions of her mat it was HUGE! I guess you would want a big one if you are doing all your dishes by hand, but I just want a smaller one to put sippy cups on after they get out of the dishwasher.
So, step number one: cut a piece of terry cloth 21″x16″
Cut three strips of fabric 5.5″x16
Cut two strips of coorinating fabric 3.5″x16
Sew it all together.
Iron your seams so the the two smaller pieces are pressed towards the three larger pieces. This makes it look like they are inset. Next you are going to put the right side of your pieced fabric to the right side of your terry cloth and with a half inch seam sew around the edge. Be sure and leave an opening big enough to pull it right side out. Pull it right side out and then hand stich the small opening shut.
Now your are going to topstich with a triple stich (I’m soo happy my new sewing machine does a triple stich!!) a fourth inch seam on your three larger panels. You can do a regular stich, but the triple stich gives it a little more substance. Once you do those six lines you are going to do a half inch top stich around the edge of the mat to give it a more finished look. And your done! Soo easy and way cuter than an old dish towel on the side of your sink!
This is one I made for my little sister.
I love putting dish soap in an olive oil bottle. It makes the kitchen sink look a lot prettier than it would having a plastic bottle sitting there. My little sister was over here last week and thought it was such a cute idea. So when I was racking my brains trying to figure out what to get her for a college graduation present I remembered that she loved my olive oil dish soap dispenser. I know your thinking that that’s a lame present to give for a graduation, but I know my sister will love it. Her husband does all the cooking and she does the dishes so I also made her a girly dish drying mat. I’m thinking maybe next week I’ll do a tutorial on the dish mat if anyone is interested. They are super easy and look soo much cuter than putting a dish towel on the counter top. I need to make a few more for me and for my mom. I promised to make her one months ago and I still haven’t done it yet.
(This is an old post off my old blog. Sorry if you’ve already seen it. I’m just taking a little bloggy break and will be back next week with new posts. Thanks!)
Linking to: Somewhat Simple
Stroller Blanket
Necessity is the mother of invention. – Plato
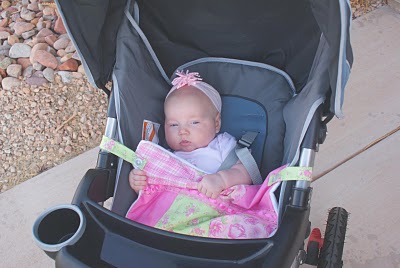
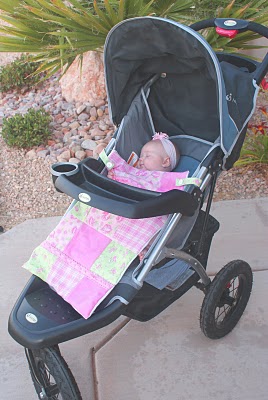
And a stroller blanket, I believe, is a necessity. I came up with this little blanket because I hate picking the blanket up off the ground and putting it back on the baby (yuck!). Maddy seems to be a little kicker and is good at kicking her blanket off every ten steps. However I can’t let her go blanketless or else her legs would fry in the Southern Utah sun. I made this while the girls were down for a nap. Yay for an easy and useful project!
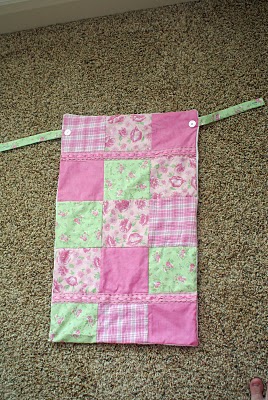 Here is the dimensions of the stroller blanket. The finished size is 15 inches by 25 inches long. The straps are 8 inches by 1 inch (finished). So if your using solid fabric you would cut it at 15.5 inches by 25.5 inches and use fourth inch seams. If you want to make the top patchwork style with squares instead of a solid piece of fabric you would need 15 squares 5.5 x 5.5 inches. Once you get your straps sewn together and turned right side out all you do is sew button holes at the end of the strap and then sew your buttons on the top of the blanket and your all set. I hope that makes sense. It’s just a simple blanket with straps sewn at the top. But if anyone needs more info I would be happy to go into more detail.
Bunny Bows!
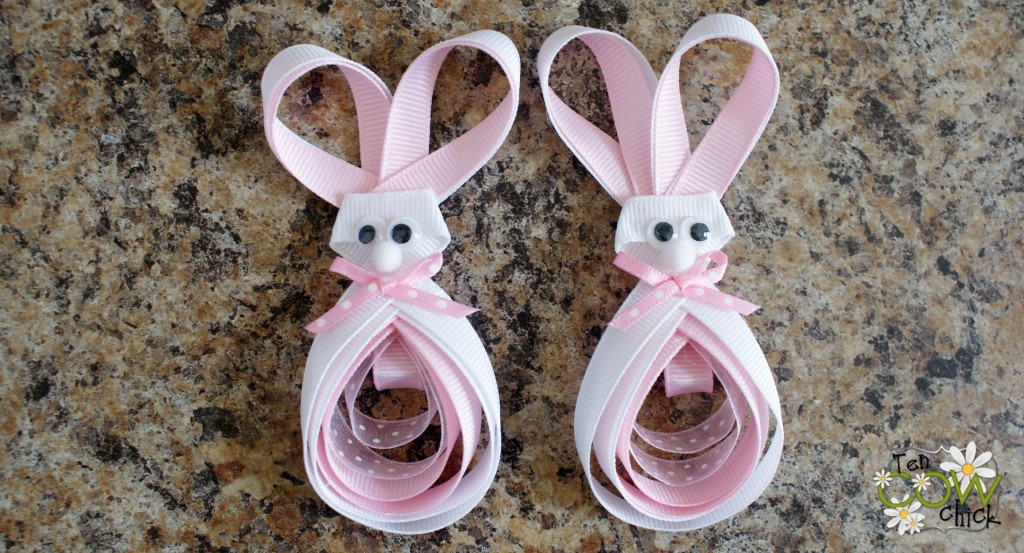 I’m soo excited to share my bunny bows with you! They’re soo springy and cute! Do you want to make some for your little girls? Let me show you how!
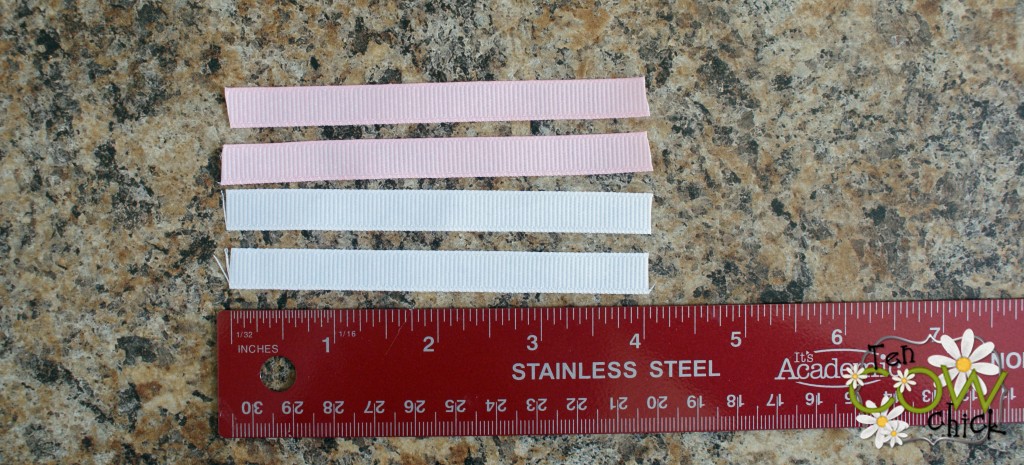
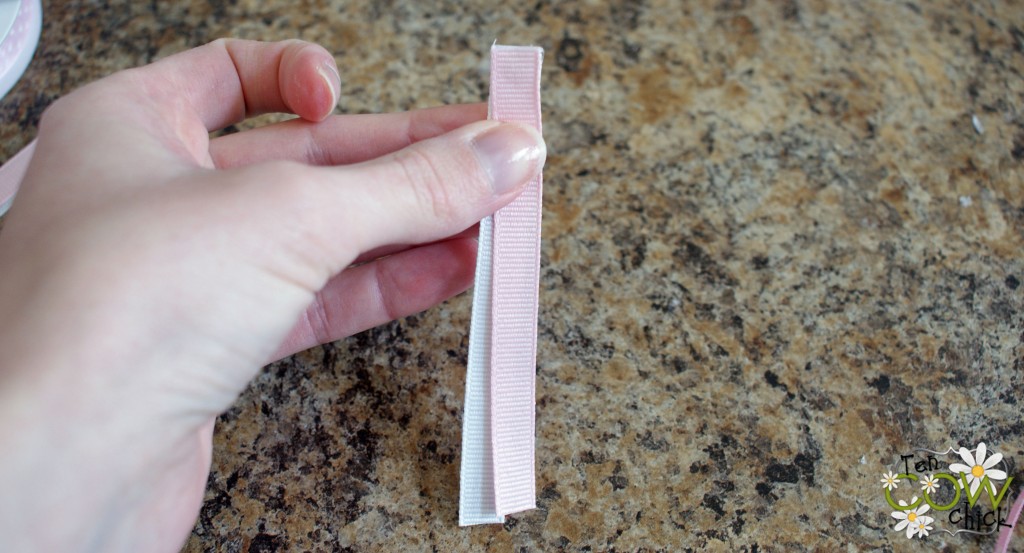
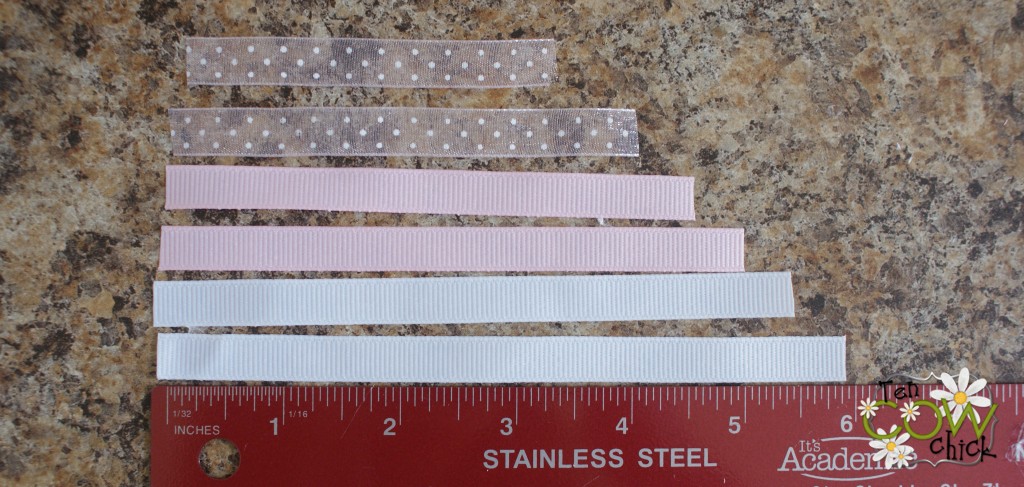
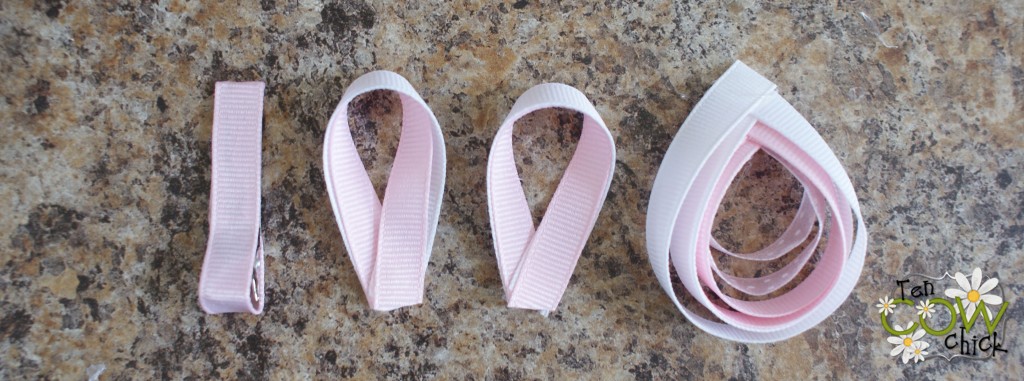
Lets start with the ears. Your going to want to cut four pieces of ribbon four inches long. Two white for the outside of the ear and two pink for the inside.
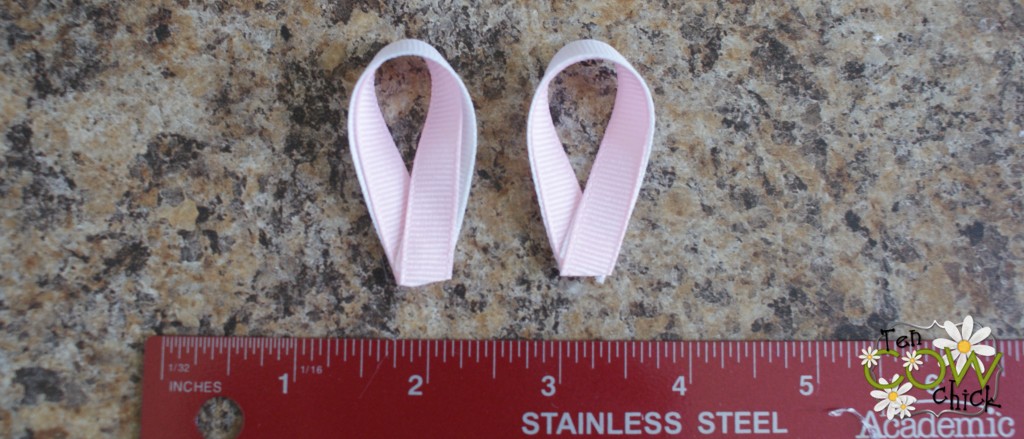
Alright, so here is the only slightly tricky part of this whole thing. Your going to hot glue one end of a white and pink ribbon together and then loop it around before you hot glue the other end. The pink will slide out an eighth or a fourth of an inch because it’s on the inside. Glue the ribbon ends together so they make ear looking loops.
Like so.
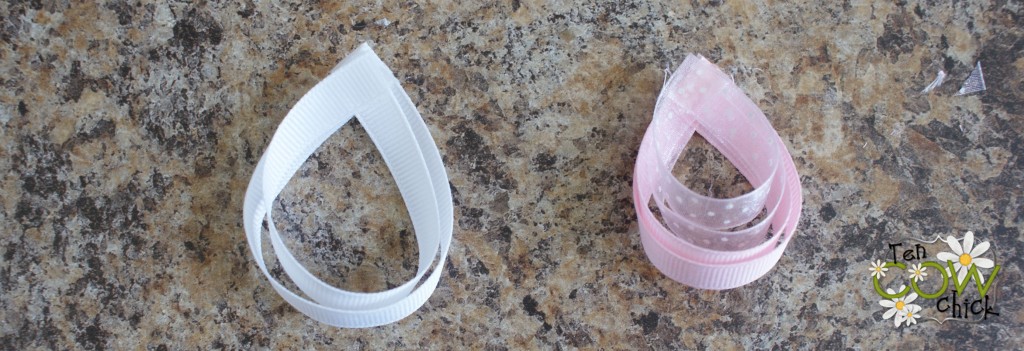
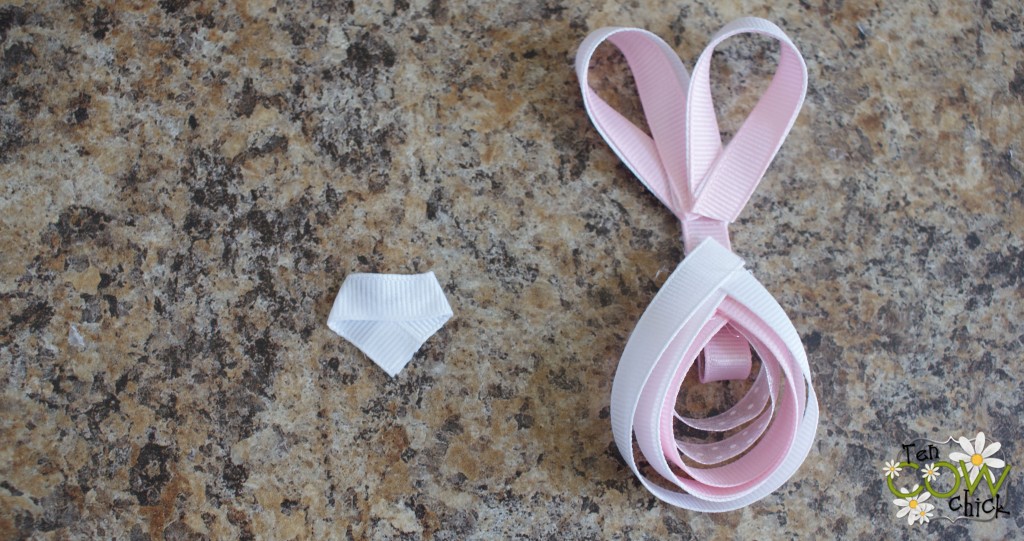
Next we’re going to make the bunny belly. Cut six pieces of ribbon, one of each of these measurements: 6 inches, 5.5 inches, 5 inches, 4.5 inches, 4 inches and 3.5 inches. If you don’t want to make such a full looking belly you could just do three pieces of ribbon, one 3.5, 4.5 and 5.5.
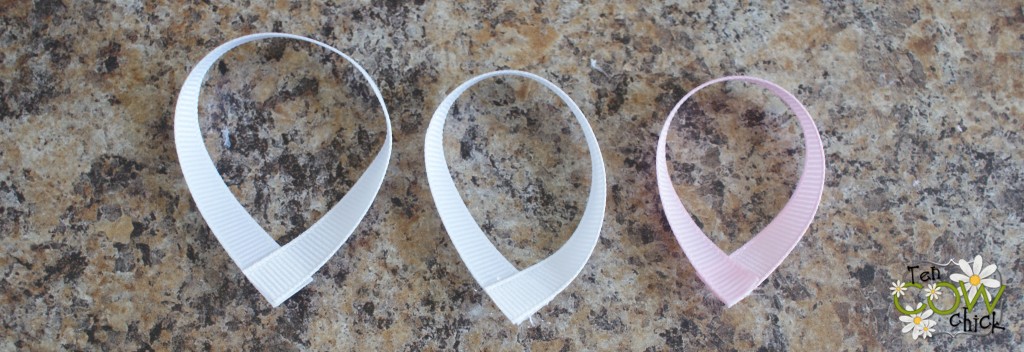
Loop your ribbons around and hot glue them at a right angle on the end of each other. Does that make sense? Just look at the picture you’ll see what I mean.
Start stacking and hot gluing the layers together where the ribbon came together at a point.
Take a hair clippy and line it with ribbon. Now we are ready to assemble our bunny.
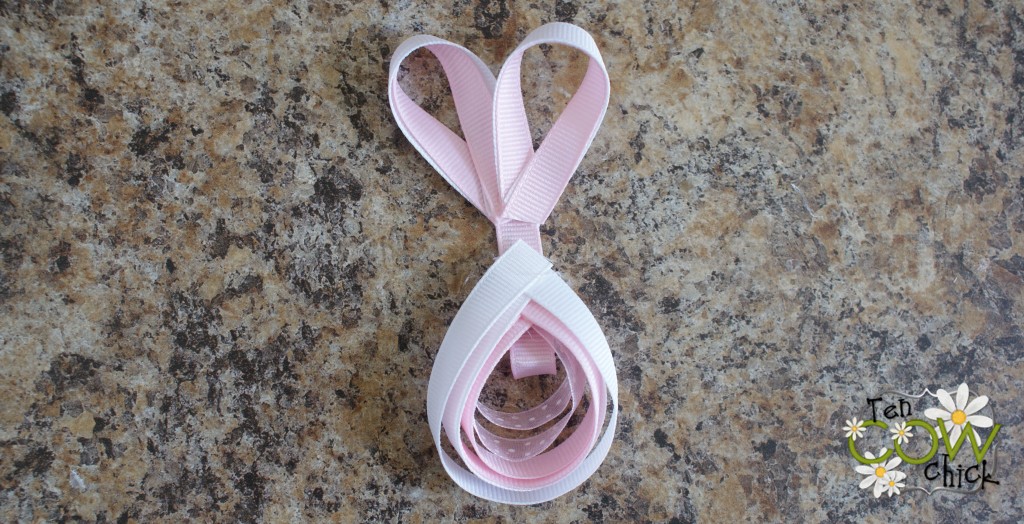
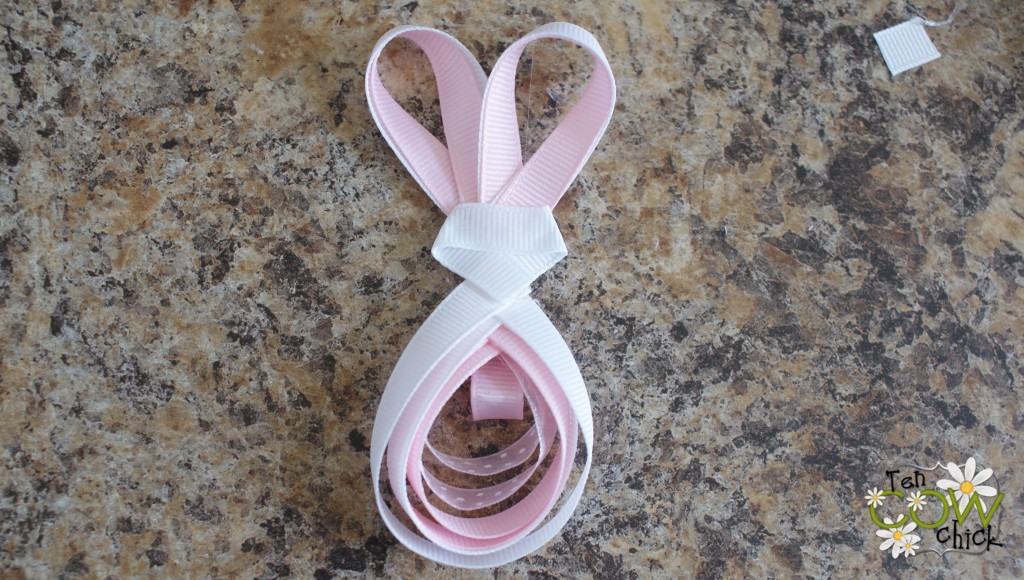
Overlap the ears and glue them together and then glue them to the clip. Glue the belly about a fourth inch underneath the ears.
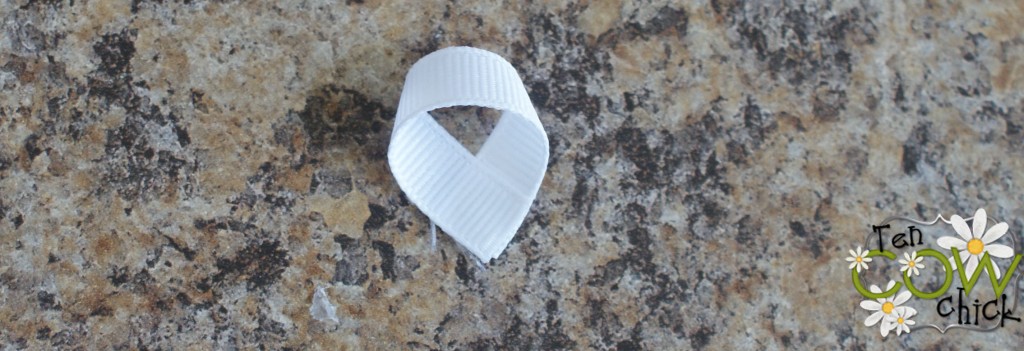
The last step is to make the face. Take a 2.5 inch piece of white ribbon and loop it around and glue the ends together.
Take your little white loop and mash it down and crease it with your fingers. Take your hot glue gun and squirt a little glue in the corners where it overlaps on itself.
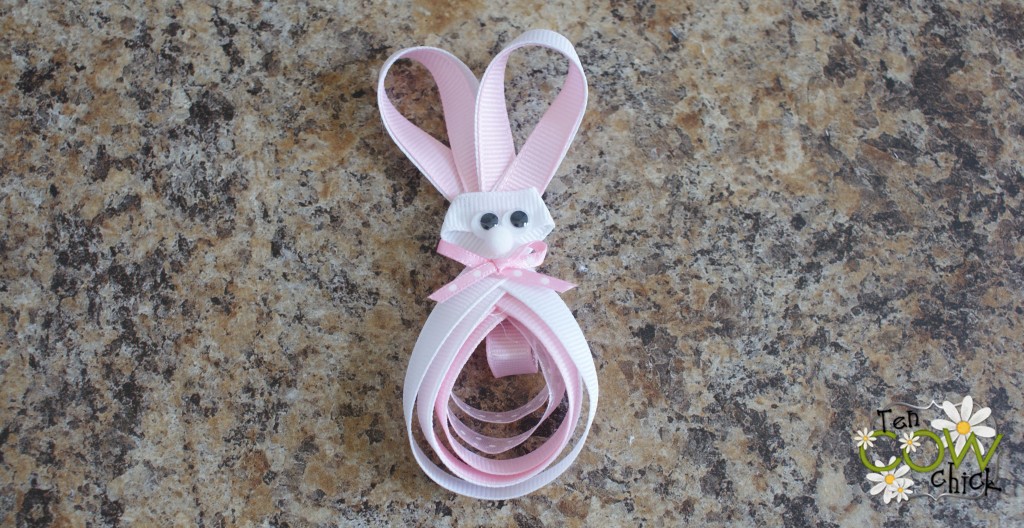
Line up the triangle on your bunny face with the triangle on the body and glue it down. Add googly eyes, a mini pom-pom nose and make a little bow tie. And you are all done!
Aww, what a cute widdle bunny wabbit! Inspiration for these came from this etsy shop.
Hoppy bow making to ya! (Sorry I had to say it.)
*If you want to make these a little smaller then cut the ears at 3.5″ and the body at 3″, 4″ and 5″.
Easter Preparations
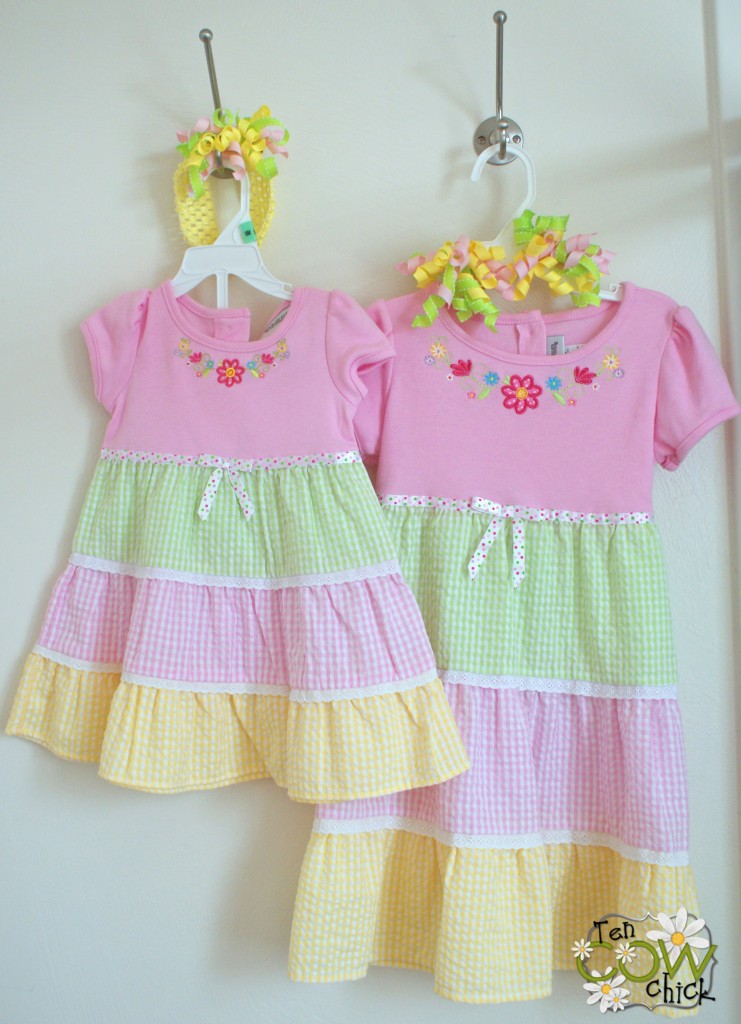
I’ve mentioned before that Easter is my most favorite holiday. For many, many reasons I love Easter and I’m soo excited for it this year. First off, I found some adorable spring dresses at Kohl’s on killer sale! Woot! Woot! I made up some korker bows to match. Easter is over a month away so I’m going to let the girls wear their new dresses now. Why wait? Maybe I’ll get around to making them another set of dresses to wear for Easter Sunday. (The ribbon really isn’t that bright, I think I just messed around in photoshop too much.)
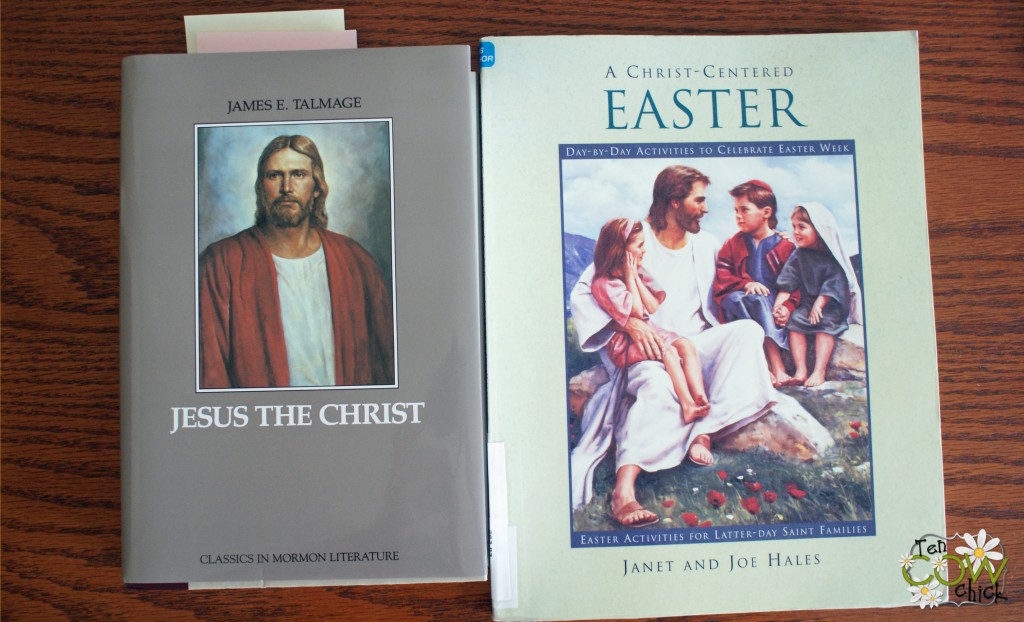
The other thing I am excited about is this book I got from the library. It’s called “A Christ-Centered Easter Day-by-Day Activities to Celebrate Easter Week Easter Activities for Latter-Day Saint Families.” by Janet and Joe Hales.
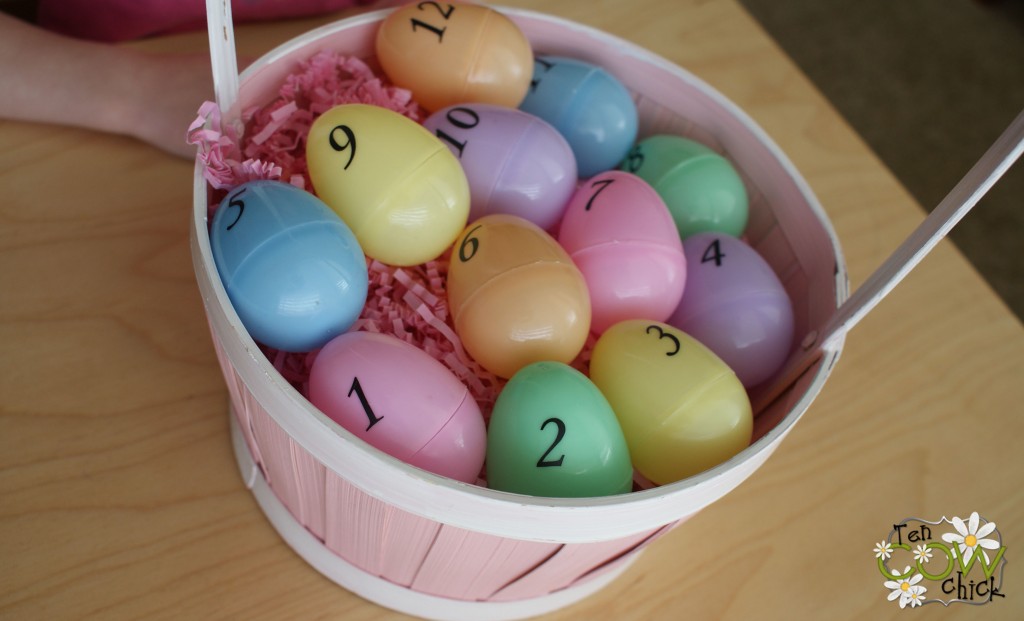
I checked it out last week and then on Sunday Maddy was too sick to go to church so I ended up staying home with a sleeping sick baby. I got to spend the whole three hours studying this book. There are a lot of references to Jesus The Christ which I love because that’s no fluffy doctrine, also a lot of references to the Topical Guide and of course the Bible. It was a great study session for me and I learned some new things. Things that I’m sure I won’t be able to teach Macey about for a few years, but it’s great to have this book for when she is ready for the deeper lessons. I’m definetly going to go buy one at Deseret Book. This book is full of great information and it has a ton of activity ideas. I want to do them all! A lot of the activities require preparation and planning ahead so I’m starting early. The first one that I am working on is the Easter Story in Eggs.
I’ve done this before with my primary class, but I wanted to make a nicer set that we can keep and use every year. You know how Christmas is a big holiday for most families? Well, I want Easter to be a big deal at my house. I want my girls to remember the awesome Easter’s we had. I’m looking forward to the Easter eggs, chocolate bunnies and the lessons about the Resurrection. Does your family have any unique Easter traditions?
Activity Days – Time Capsules
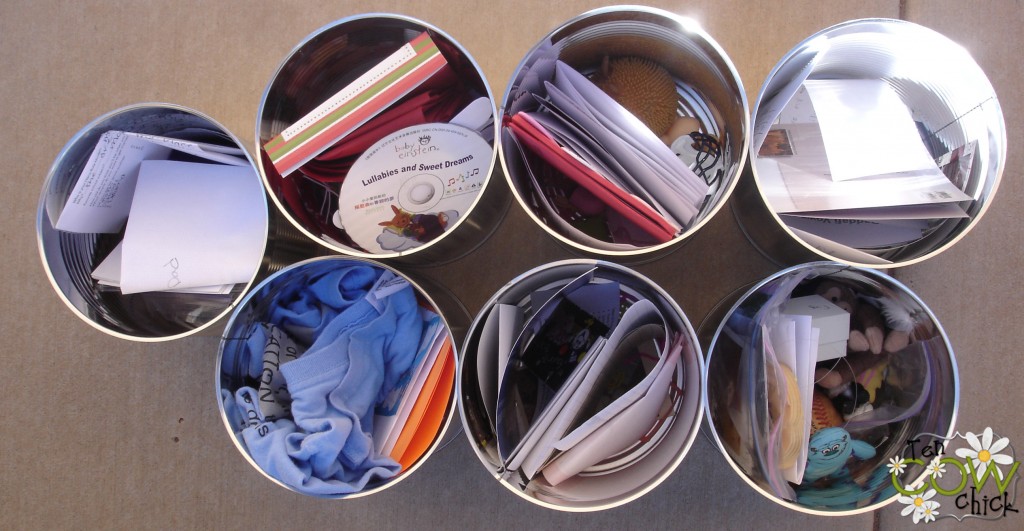
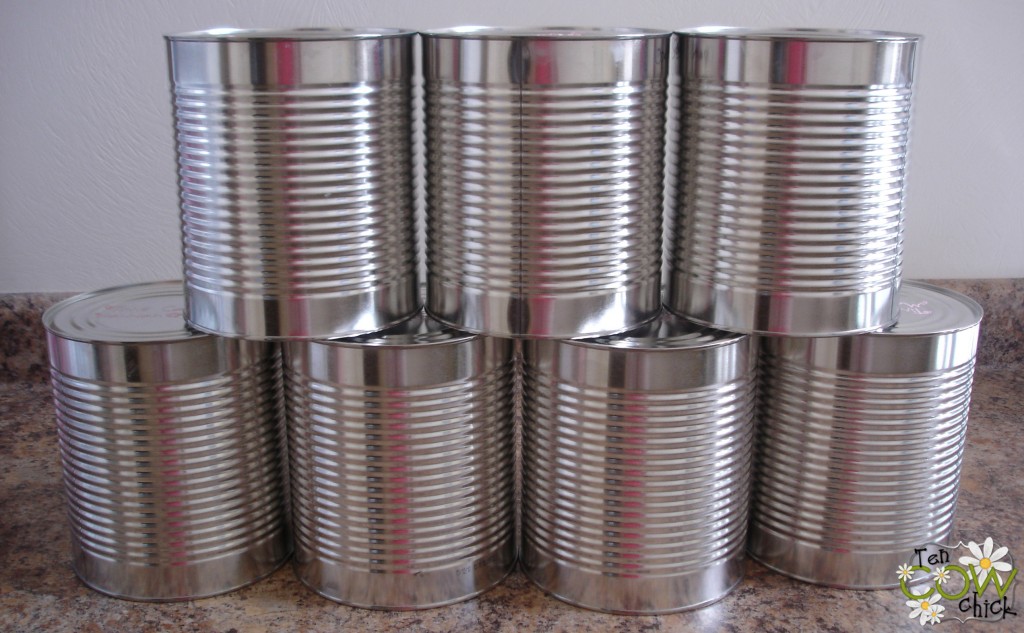 For our last activity the girls put together their very own time capsule. I did this when I was in Young Womens and I just opened it last month. It was fun to go through and see what “treasures” I had put in there. I had my girls camp necklace, sunglasses, a CD (I thought we’d be on to some new technology in ten years), notes from friends and a form that the young women’s leader had put together for us to fill out. Before our activity I went to the cannery and picked up number ten cans and made up a form for the girls to fill out. The one I did in young women’s was lengthy and had questions like “What ten traits do you want in your future spouse?” I doubt the little activity day girls would want to fill that out. They all gagged at the question “When do you think you’ll get married?” I just put that on there because you really don’t know. Some of the girls were like, “I’ll get married when I’m thirty.” Another girl said she wants to be a old cat lady and never get married. Another question was “Which temple do you want to get married in?” They all wrote down the one that their parents got married in. Then at the activity I showed them the can that I had put together and we talked about what a time capsule is and they filled out their own little information sheet. They took their cans home and filled them up with their goodies and brought them to the next activity. I sent them home with a list of suggestions like: last family Christmas card, pictures of your bedroom, souvenirs from trips, write down your testimony, etc. This is what the cans looked like when they brought them back.
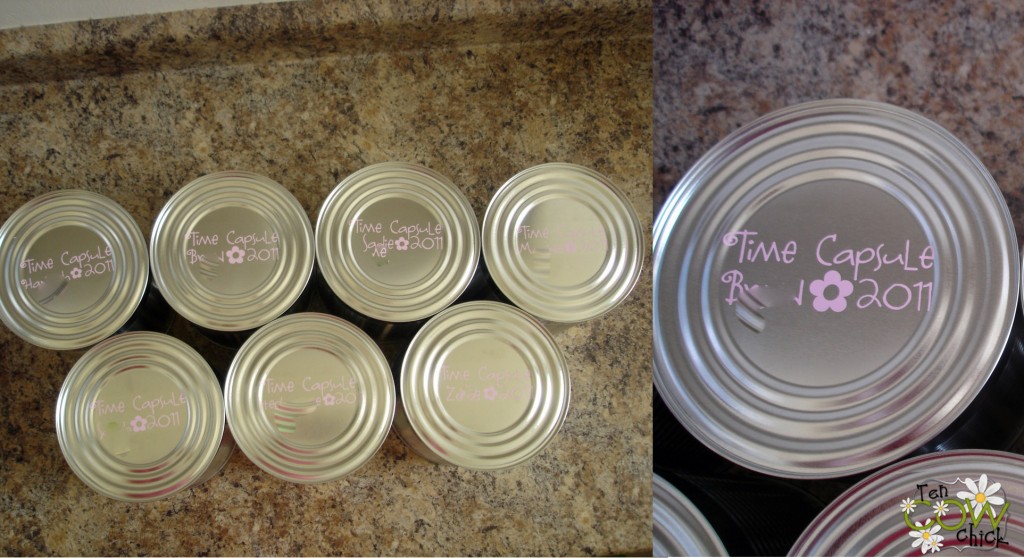
I took them into the cannery and had this kind Brother put lids on them.
Then when I got them home I put their names on the top in vinyl. At the activity I had them write their names on the bottom in marker because once their sealed up there’s no guessing who’s is who’s.
It was a fun activity and the girls loved them! I hope they wait a good ten or twenty years before they open them!
Activity Days is an LDS activity for eight to eleven year old girls.
To learn more about my religion click here.
Linking to: Someday Crafts, Somewhat Simple
Family Word Art
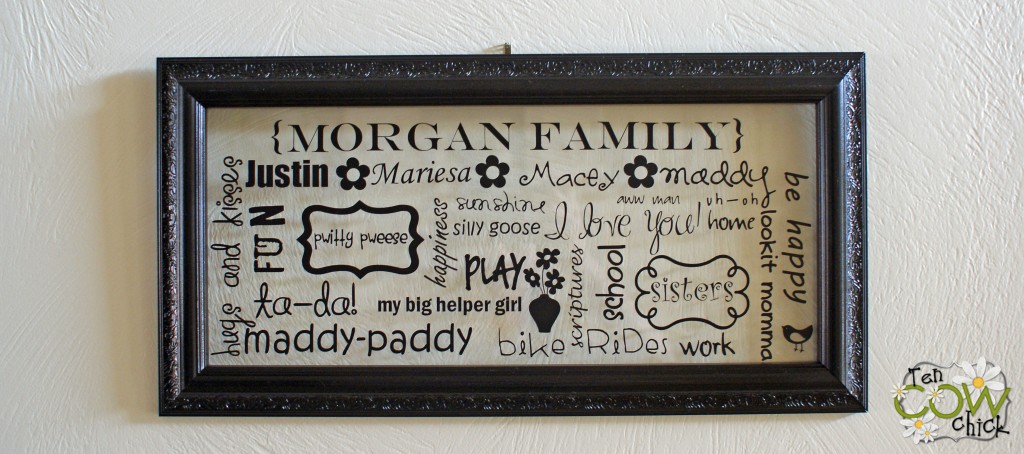
I have a confession to make. I just barely took down my nativity silhouette. You see, I didn’t have anything to replace it with so I just left it until I could come up with something to put in it’s place. After much thinking I decided to do my own twist on a subway/word art. I did a word art of words that are commonly said in our house. My girls are little so there are a lot of “uh-oh’s” and “lookit momma’s”. I thought it would be fun to capture all the things that are said a lot right now, especially Maddy’s famous word, “ta-da!” I bought the frame at Wal-mart for five dollars. It had one of those wierd brown/metallic finishes. Gag. So I painted it with Krylons’ glossy black spray paint and it looked tons better. After I painted it, I glued the glass into the frame with my favorite E-6000 glue. I even used that glue to put a hanging bracket onto the back, it was soo much easier than nailing it on. Haha, it’s like liquid nails. Then I created the word art in Silhouette’s software. Most of the fonts I used came from kevinandamanda.com. I’m quite happy with the way it turned out. It’ll be interesting to see how much the words that come out of my little girls mouths change over the next few years. Macey keeps telling me “it’s pwitty mommy,” but I think she just likes it ’cause it has a cute little birdy in the bottom corner. 🙂
Linking to: Craft-O-Maniac, Skip to my Lou, Someday Crafts, Somewhat Simple
Baking Bread
My little baby is sick, so here is a old post. Hopefully I’ll be back on Monday!
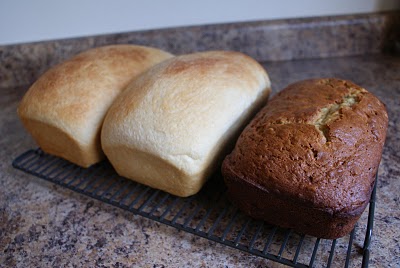
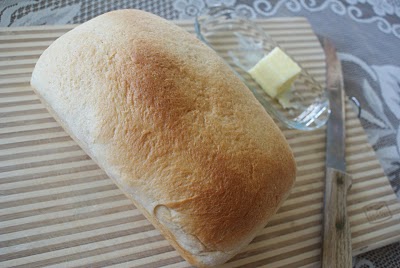
Yesterday I got up bright and early (not by choice, my little girls don’t know how to sleep in) and made two loaves of wheat bread and one loaf of banana bread. I always have “bake bread” on my to-do list but it never happens because I don’t get around to it until it’s too hot outside to turn the oven on inside. The house smelled so good yesterday though, I think I’ll try and get up and get the dough started early more often. Justin ate half the loaf at dinner time last night, so I think I’ll have to bake more bread in a few days anyways. The recipes I use always turn out really good so I thought I’d share them with you.
Wheat Bread
2 1/2 cup warm water
2 T. yeast
2 T. white vinegar
2/3 cup sugar or 1/2 cup honey
5 1/2 cup whole-wheat flour (I do 3 cups wheat flour, 2 1/2 cups white flour)
1/2 cup wheat gluten
2 t. salt
4 T. dry powdered milk
2 T. oil
1/2 cup potato flakes
Mix ingredients in order listed for 12 to 15 minutes in mixer bowl with dough hook attachement. Let rise until double – 1 to 1 1/2 hours. Punch down, then shape into loaf or rolls. Let rise again until double and bake at 375 for 20 to 30 minutes until crust is golden brown and bread sounds hollow when lightly tapped.
Banana Nut Bread
1 cup sugar
1/2 cup butter
2 eggs
2 cups flour
1 teaspoon baking soda
1/2 teaspoon salt
3 bananas mashed
1 teaspoon vanilla
1/2 cup chopped walnuts
Heat oven to 350. Cream sugar and butter. Add eggs and beat well. Sift or mix flour, baking soda, and salt. Add bananas (I mash them up in a pie plate with a potato masher, it seems to work really good), vanilla and nuts. Put batter in a greased and floured loaf pan and bake for 1 hour.
Scripture Journal
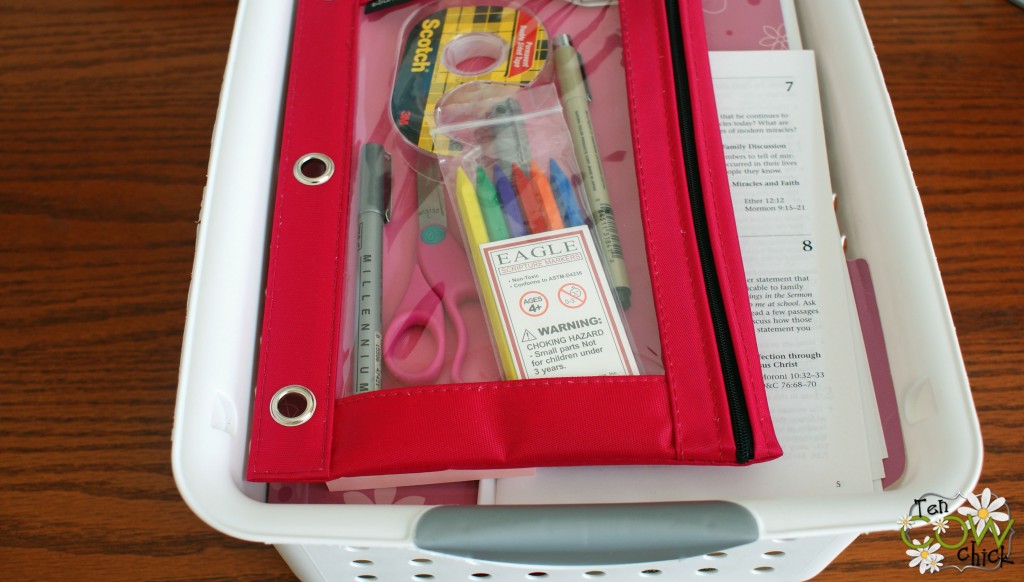
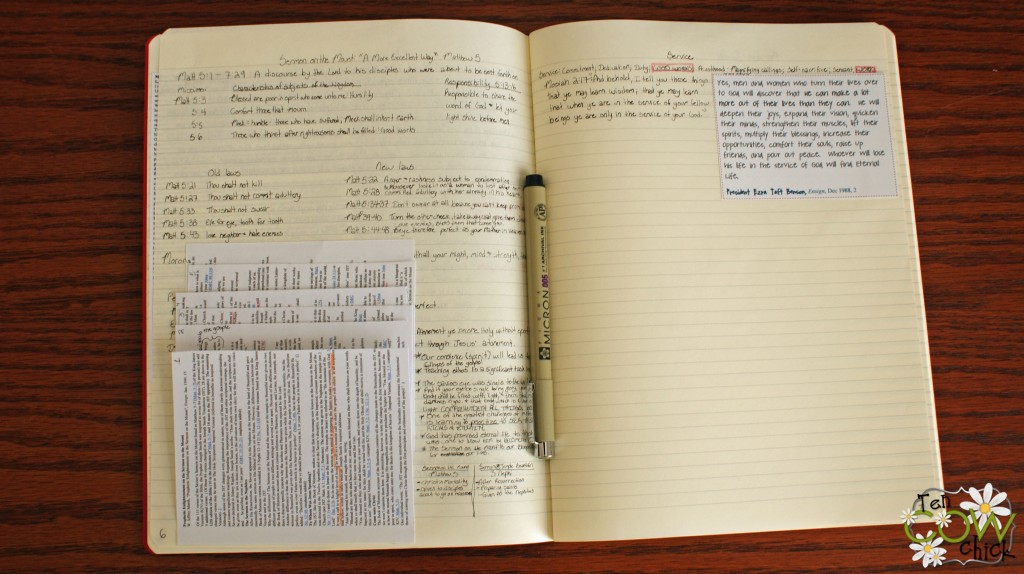 My scripture journal brings me far more joy and happiness than any project or craft that I complete. I love how much I have learned by picking a gosple topic and then researching it and writing about what I learned. I have had far more lightbulb moments studying this way than just casually reading a article or a few scriptures on a subject. Since I last posted about my scripture journal there have been two other bloggers post about theirs and I wanted to share the links to them. There are soo many different ways you can set up your journal so I want to share these ideas. The first one is from Chocolate on my Cranium. She posted about journals in general but then towards the bottom of her post she talks about her scripture journal. When you stop by her blog be sure to check out her flannel board section – it makes for some great family home evening resources. The other blog is Mamas Who Know. She posts about how she set up her scripture journal while she was in the MTC. I love how she says that her journal is a treasure to her. That’s what mine is to me and I just started it not too long ago. My other two favorite posts about scripture journals (I have linked to them before, but if this is your first time reading about them be sure and read these), is from Women in the Scriptures and Red Headed Hostess. Since I started my scripture journal I have made a journal basket to keep all the supplies I need in one spot.
It makes sitting down and studying so much easier. I have a folder that I keep my weekly journal quotes handouts in, old conference Ensigns, the Relief Society and sunday school manuals, post-it notes and a pencil keeper to hold scissors, double sided tape, and scripture pencils in. I have a page in there that I call “random thoughts” it’s a page that I just write down whatever thoughts or promptings I have. There’s a quote by Elder Gene R. Cook, “I’ve found, as I’m sure you have, that when you’re trying to learn from the Lord and you feel an impression from the Spirit…Its important to make a note so it will not be forgotten. The more you not only hear but abide by what you’ve been told, the more the Lord will give to you. It will come more and more rapidly and you will begin to hear and feel those impressions of the Spirit more quickly than you have previously done.” (Address to Religious Educators, 1 September 1989) No matter what your faith is you can start a scripture journal. Just do it, it’s fun!
Linking to: Someday Crafts
I-Spy Bag Tutorial
I’m running out of things in my church bag to keep Macey entertained, so I decided it was time to make an I-Spy bag. 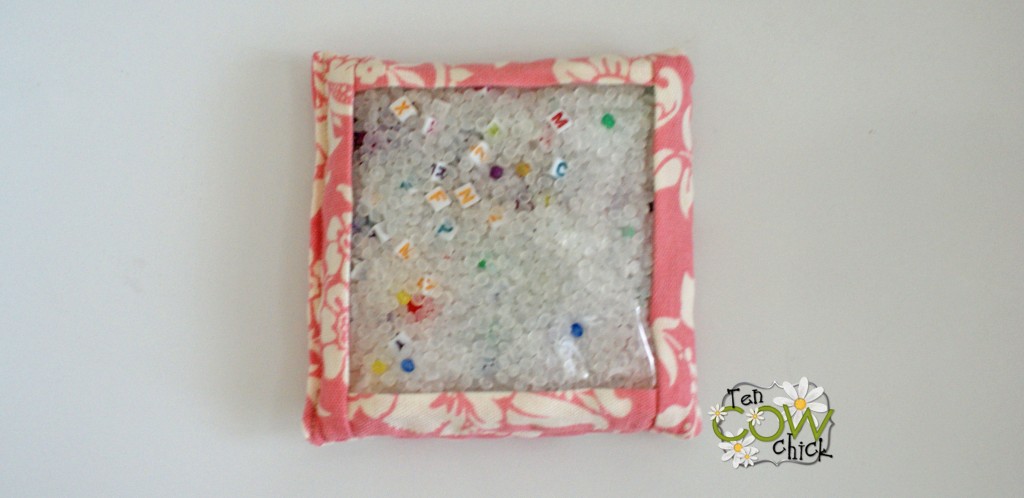
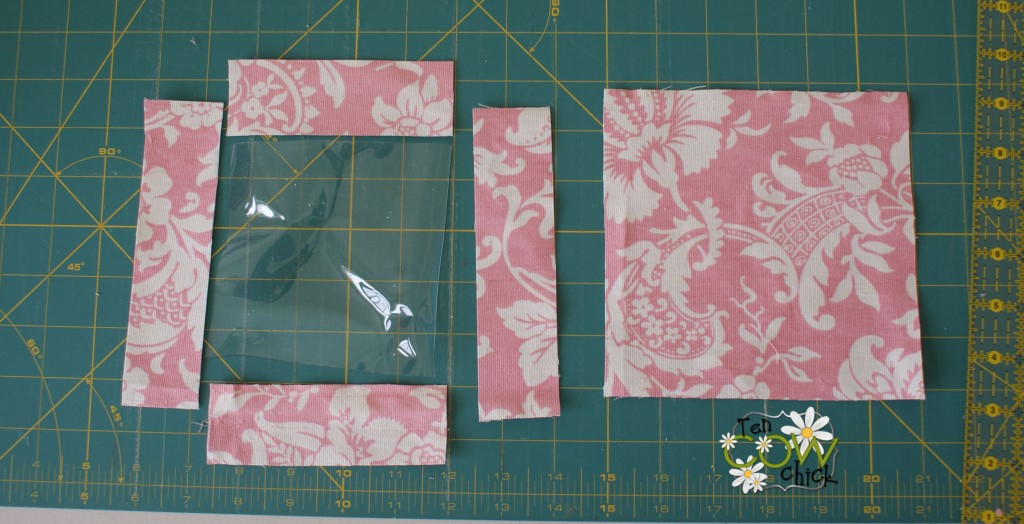
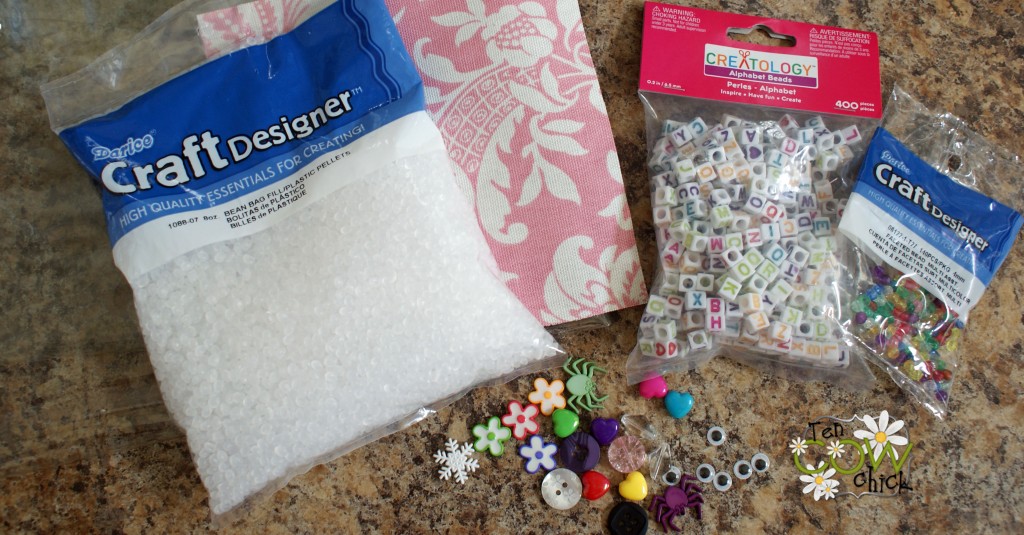 Here’s all the supplies. I bought the bag filler at Roberts and the alphabet beads were from Michaels (I didn’t use all of them so they can be used for another project) everything else I had on hand. I put in novelty buttons, googly eyes, and beads. The clear vinyl you can get at a fabric store by the big rolls of tablecloth vinyl. I had mine left over from high school from when I had to have covers on my books. Crazy.
You’ll only need a fat quarter or a fourth of a yard of material for this project. I just grabbed some outdoor canvas material I had on hand that was left over from this other project. Cut your material so you have:
(1) 6 x 6 inch square of fabric
(1) 4.5 x 4.5 inch vinyl square
(2) 6 x 1.25 inch strip of fabric
(2) 4.5 x 1.25 inch strip of fabric
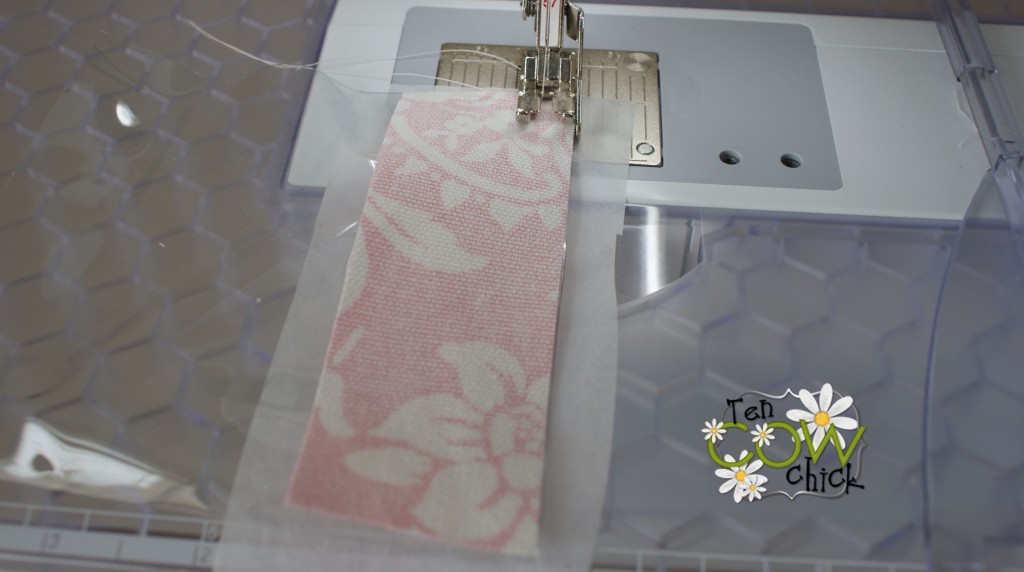
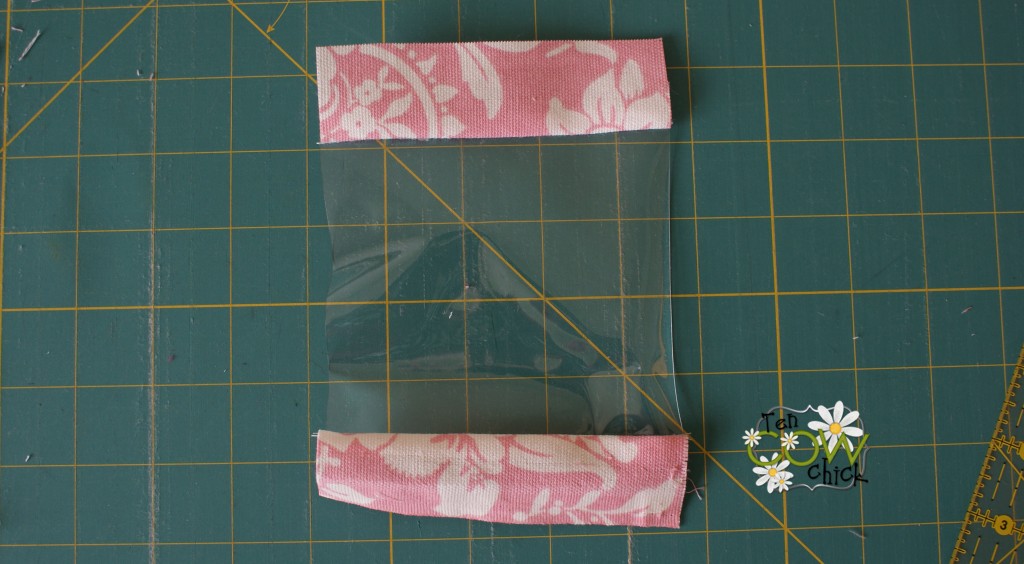
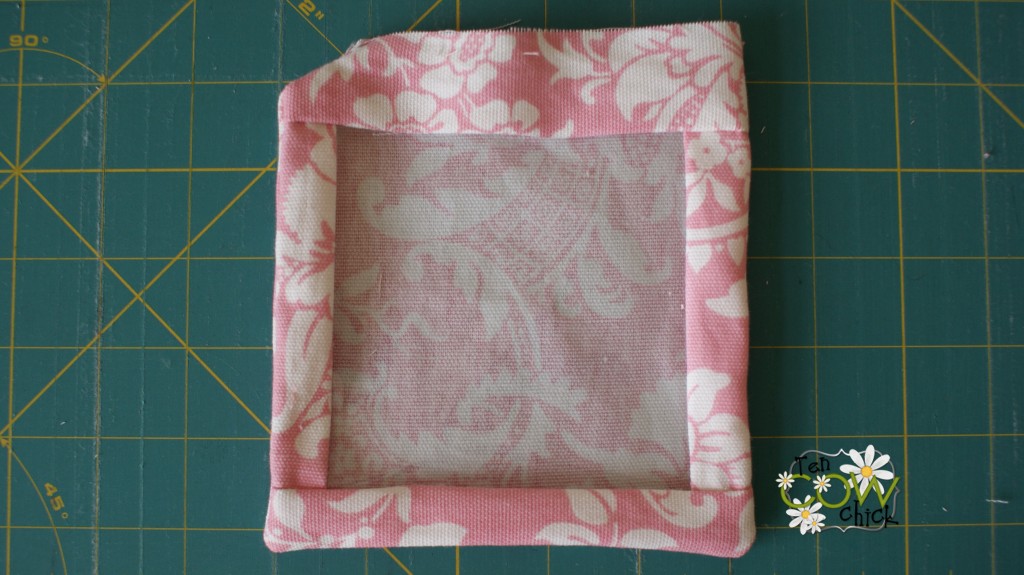
Take your vinyl square and your two 4.5 x 1.5 inch strips of fabric and sew them onto opposite ends of the vinyl with a fourth inch seam. If your vinyl sticks to your machine put a strip of tissue paper underneath it. After you sew your seam just rip the tissue paper off.
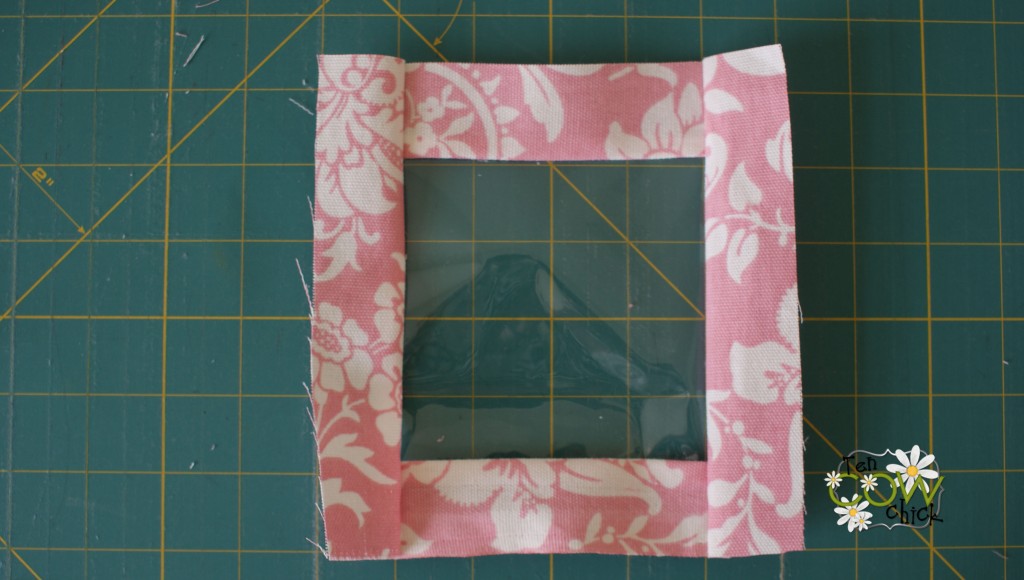
That’s how your middle strip will look like once you sew the material on. Now sew your long strips of material onto the other sides. Don’t iron your seams down . . . that would be bad. (haha, hehe)
Lay your 6 inch square of fabric down and put your finished top face down on top of it and sew around three sides. Turn it right side out and fill it up with your filler.
Flip your raw edge in a fourth of an inch and either hand stitch it shut or use your sewing machine and sew it shut with a eighth inch seam. And there you have it, an I-spy bag.
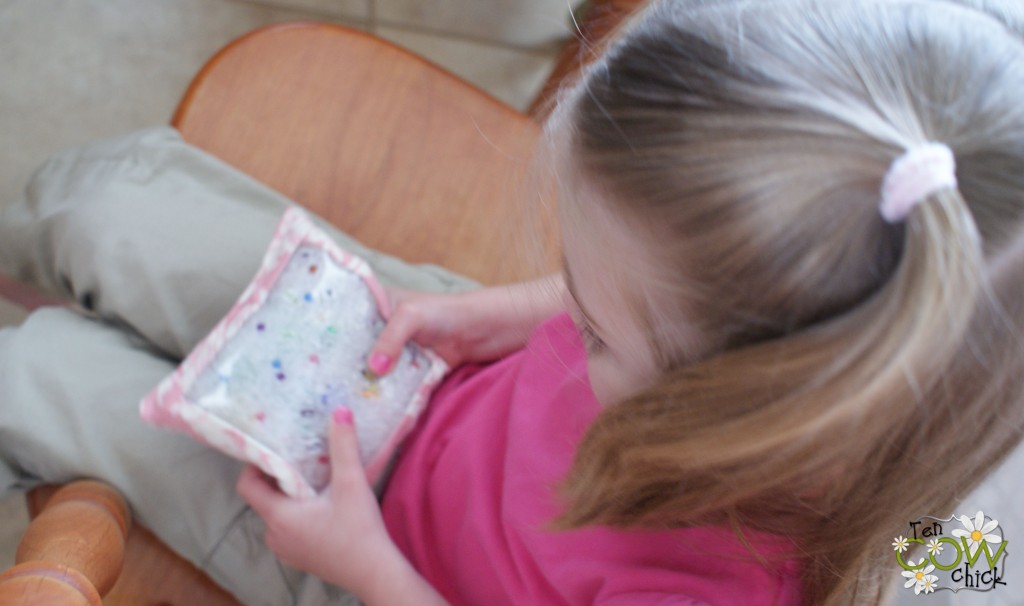
Macey has been playing with it all morning and she told me “thank you for the bean bag mama, it’s fun.” Aww that just melts my heart. That right there is why I love to make things for my little girls. I’ve got to sneak it away from her sometime today and stash it in the church bag so she will actually sit and play with it at church next Sunday. Anyways, if you have any questions with the tutorial let me know!
Linking to: Craft-O-Maniac, Skip to My Lou, Someday Crafts
Car Seat Canopy
It’s a busy day today so I am going to re-post an old but popular post and I’ll see ya on Monday. Have a great weekend!
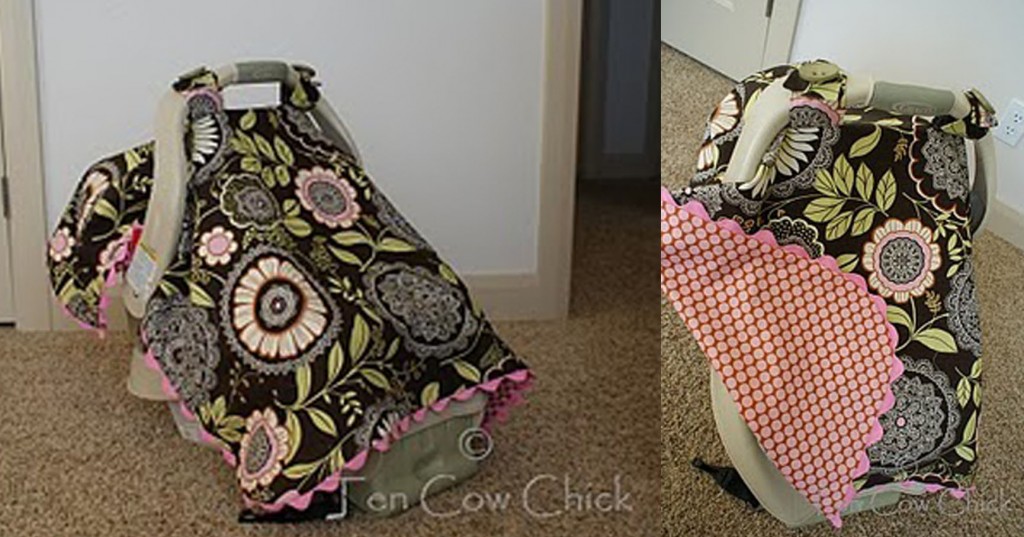 Wahoo one more project done! I love this fabric. It’s Lotus by Amy Butler just in case anyone wants to know. All it is is a blanket made out of 2 yards of fabric (one yard per side), plus you need 1/8th yard for the straps. And then you just sew straps to the top of the blanket. Add a little ric-rac and some ginormous buttons and and there you have a cute car seat cover.
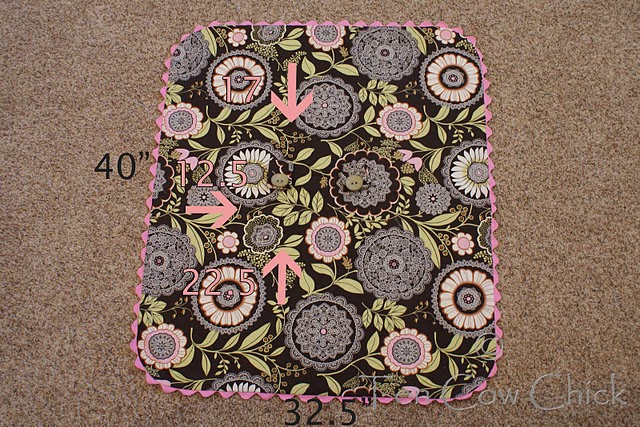
I’ve had a lot of questions from friends about the dimensions of the car seat cover so I figured I might as well post it just in case anyone else is wondering. The finished size is 32.5″x40″. It’s a little on the big size so if you want to do yours a little bit smaller it would fit just fine. The straps are placed 12.5″ in from each side and 17″ down from the top. The straps finished size is about 9″ long and 2.5″ wide. The strap was a little bit long so you might want to take a half inch or so off that if you don’t want extra strap hanging down. I hope this helps someone out. If you have questions let me know!
Linking to: Creation Corner, Tatertots and Jello


