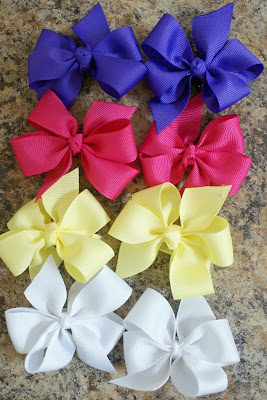
After I had Macey the girls in the ward (neighborhood) got together and had a bow party. I didn’t know how to make bows so it was fun to have someone show me how. After that I went out and bought tons of ribbon and made a bow to match every one of Maceys outfits. So here is how I learned how to do bows. I’m sure there are lots of other ways, but this is one way I do it.
First your going to need 7/8ths width ribbon and 3/8ths width ribbon, a needle and thread, hot glue gun and a clippy to glue the bow on to.
Cut your ribbon at an angle and seal your edge with a candle or Fraycheck. Then pinch your ribbon into thirds about two inches from the end.
Bring your ribbon around to make a loop and pinch it into thirds again. Pinching into thirds gives the bow some oomph and makes it poofyish.
Make a loop on the other side and pinch again. Do this until you have two loops on each side.
Once you’ve got your double looped bow your going to take the center where all your ribbon is pinched together and stick a needle and thread through it. Be sure and double or tripple knot the end of your thread! Pull your thread all the way through and then wrap the remaining thread around the center really tight.
So it looks like this.
Take your 3/8ths inch width ribbon and tie a knot in it and pull it tight.
Put the knot over the midde where the thread is and hot glue the knotted ribbon on the backside to the bow.
Now we are going to line the hair clip with ribbon (you can get these at Sally Beauty supply.) Put a dot of hot glue on the backside and put your 3/8ths width ribbon on it.
Flip the clip over and put another dot of glue on the front side and pull your ribbon around the back and to the front.
This ones tricky. Put a dot of glue on the inside of the clip and pull your ribbon around an inside. Now that you’ve got your clip lined with ribbon and there’s no ugly metal visible stick a big dob of hot glue on top of the clip an glue your bow down to it.
And your finished! Except your going to want to cut your ends so they are the matching length. Maybe it’s just the funny angle of the camera that makes one look longer than the other.
Rinse and repeat as desired.
{Thanks for the awesome dishes Virginia!}
Macey looks soo cute with piggy bows in her hair.


Thanks so much for this tutorial. I have been wanting to make these forever and didn’t know anyone to teach me. BTW – I love the name of your blog and mentioned it recently in one of my posts. I read where you said, “Mahana, you ugly” and I just about laughed so hard I almost had an accident. I love the original video…
Haha, thanks Erin! 🙂
I always hook the back of the knot directly to the clip (on the inside) and THEN glue the ribbon lining on the inside. It helps hold the bow on to the clip too. (=
Does the ribbon have to be grosgain to make the curly bows?
Thanks
Hi Kyla – it doesn’t have to be grosgrain – but grosgrain does hold the curly shape better than satin ribbon does. Thanks!
Love this – totally making some to match my daughter’s Easter and birthday outfits! yay!
Love this! I’m totally making some to match my daughter’s Easter and birthday outfits!
Thank you sooo much for your wonderful demonstrations!! Some of these bows I’ve been looking all over the Internet for.. You have created an awesome site.. Really appreciated
thanks
What length do you cut the ribbon into??
The pinching is the hardest part of making bows with 7/8 ribbon. Then, the trying to hold the *made* pinches while making your next. It gets very frustrating until you can find your groove after doing it over and over.